Friday, March 30, 2007

Blogger News Roundup

Like most of us, I've been pretty busy (and tired) lately, so as usual, I'm catching up on all the news, and recipes I'd like to try.

Braised Ribs with Porcini and Rosemary

Another Molly Stevens recipe. I'm just going to post some pictures from this one - the instructions went on for about three pages, even though the dish is not complicated at all. Trust me!

The greasy hands above are Master Chow's, coming back for his second plateful of ribs. The sauce had a rich taste of porcini mushrooms. In fact, the scent and taste were so exciting, that little Gus, was walking around on his hind legs, sniffing the air! He was lucky enough to get a taste.

I decided to make this dish because I had been digging around in the freezer for a pot roast. I pulled out the package, only to discover a while later that it contained some rather fatty ribs. "Master Chow!" I said. "Did you buy these?"

"Yes," he replied. "But you have to make them quick - I bought them for cheap because they were old."

Ah. I see.

After they passed the sniff test, I turned to Molly Stevensyet again, as I had never before made ribs. I had fresh rosemary, and a copious supply of porcini mushrooms that I keep stashed. Had a bottle of wine, and other aromatics.

We were not disappointed. Next time, I will add more liquid during the braise so that there is more sauce to slurp.

1. Step one - prepare the marinade, which includes onion, wine, allspice, and peppercorns. I added some parsely.

2. After a 24 hour marinade, I dried off the ribs and broiled them quickly until browned.

3. Preparing the braising liquid - onions, tomatoes, wine, rosemary, porcinis, and a spice sachet.

4. Three hours later - ta da! Ribs! Master Chow ate them all! Cleaned the bones!

Tuesday, March 27, 2007

Braised Brussels Sprouts

Another easy vegetable recipe from Molly Stevens's All About Braising. Stevens says that this may convert Brussels sprout haters, but I doubt it. It does take the edge off the sprouts, making them less pungent, but they still taste like Brussels sprouts! Luckily, we like that. I adapted the recipe by adding a touch of lemon zest.

Creamy Braised Brussels Sprouts
Adapted from "All About Braising" by Molly Stevens
  • 1 pound Brussels sprouts
  • 3 Tablespoons unsalted butter
  • 1 teaspoon lemon zest
  • coarse salt and freshly ground pepper
  • 1 cup heavy cream
  • 1/2 lemon

Trim base of each sprout, discard ragged outer leaves, and then slice each one in half, thirds, or quarters (if they are very large). The point here is to have a bunch of pieces that are approximately the same size. Each wedge should be about 1/2 inch across.

Melt butter in a large skillet on medium-high heat. When the foaming stops, add the sprouts, salt, and pepper. Cook, stirring occasionally, until sprouts begin to brown.

Pour in the cream, add the lemon zest, and stir. Cover pan and reduce heat to low simmer. Braise until sprouts are tender, about 30-35 minutes. The cream will have reduced and will be a light tan color.

Remove the cover, squeeze in lemon juice (squeeze from lemon half), and adjust seasoning. Simmer, uncovered, for a few minutes to thicken cream to a glaze that coats sprouts. Serves 4 to 6.

Fresh Water Chestnuts


Can be hard to find, but they are delicious. Fresh ones are not only crunchy, they are sweet.

Saturday, March 24, 2007

Spring!


Tuesday, March 20, 2007

IACP and James Bear Nominees Are Announced!

The IACP cookbook nominees are here, and you can find the Beard nominees here. Guess whose book shows up on both lists? Dorie Greenspan's!

Saturday, March 17, 2007

Blogger News Roundup

  • Chris of Mele Cotte successfully defended her dissertation, and now has a Ph.D. in Education. Congratulations, Chris!
  • Did you know that Coke makes kosher Coca-Cola? It contains sugar, part of the original recipe, instead of corn syrup, which was substituted for sugar in 1985. Via Off the Broiler.
  • Everyone's favorite Cream Puff is baking Orange Oatmeal Applesauce bread at midnight, while Ari is baking Banana Bundt Cake . . . at 5 a.m. I feel like such a slacker!
  • Kathy takes us on a tour of Honolulu's Chinatown market, one of Master Chow's favorite haunts back home. Like I've said before, sometimes I really miss Hawaii, especially when I read one of Kathy's posts!
  • Recipe I've added to my "to-make list": Dorie Greenspan's Prune and Armagnac ice cream, via Brilynn at Jumbo Empanadas.
  • Rowena blogs about Italian hedgehogs. No, she doesn't eat them, so don't worry.
  • And speaking of critters, for those of you with cats and dogs, there has been a massive dog and cat food recall due to incidents of kidney failure and death caused by aflatoxin in the food. For more information, including a list of affected brands, check here and here. **Update: more on the pet food recall, here.**
  • HAPPY SAINT PATRICK'S DAY!

Friday, March 16, 2007

Hello, Sunshine!

Spring is around the corner!

Seven Hour Leg of Lamb


Seven Hour Leg of Lamb. Unfortunately, I do not have Mae's photography skills (check out her beautiful lamb shank presentation!).

All About Braising: The Art of Uncomplicated Cooking is a phenomenal book. I have hundreds of cookbooks, but I can honestly say that there are only a few that fall in the "exceptional" category. This is one of them.
Stevens takes you by the hand, and guides you through each recipe. She gives a mouthwatering description of the dish, advises on ingredient selection, and provides detailed preparation instructions. The recipes range from the simple, such as World's Best Braised Cabbage, to sophisticated dishes like Breast of Veal Stuffed with Sausage and Red Pepper, to classics such as Coq au Vin.
Stevens teaches you how to braise properly, and how to layer and concentrate flavors. The results are shockingly good. I say "shockingly" because the end products taste like so much more than you thought they would.
One thing I have always, always disliked is lamb. The smell of it. The thought of it. But Master Chow loves it, and I am not a veggie-Nazi, even though I don't eat meat. What people choose to eat is their own business. I cook what he likes, just as I would cook vegetarian if my spouse preferred it. When I do make lamb for him, it is special, and I will pay a premium for organic meat that was raised humanely.
I decided, then, to treat Master Chow to his favorite, leg of lamb. And Molly Stevens provided the inspiration with her intriguing recipe for Seven Hour Leg of Lamb. It was easy to prepare, and the results were extraordinary. "What?" you say. How could someone who hates lamb know this? Precisely because I don't like it. When it was done, I picked a little charred bit to see if it was any good, and I practically swooned to the kitchen floor. Unbelievable. No, it's not enough to convert me to carnivorous ways, but what does that matter? Master Chow said it was the some of the best lamb he'd ever had.
The meat was so tender, you could cut it with a spoon, just as Molly Stevens promised. The depth of flavor was tremendous, with no gaminess. The vegetables were tender and flavorful. Serve this to guests and they will believe you studied at the Cordon Bleu.
Try this recipe. You will not be disappointed.
Seven Hour Leg of Lamb
From "All About Braising," by Molly Stevens
Recipe abbreviated to save on typing
  • One 6 to 8 pound bone-in leg of lamb (mine was about 5 pounds, so I braised it for 5.5 hours total instead of 7 to 8 hours)
  • coarse salt and freshly ground black pepper
  • 1 cup dry white wine or dry white vermouth (I used wine)
  • 2 cups stock (I used beef)
  • 2 bay leaves
  • 2 Tablespoons chopped fresh thyme, or 2 teaspoons dried
  • 15 garlic cloves (yes, 15), peeled and smashed
  • 1 cup chopped canned peeled tomatoes, juices reserved
  • 8 golf-ball sized yellow onions, or onions making up a total of 2 pounds
  • 6 carrots, cut crosswise in half, and then halved lengthwise into fat sticks
  • 6 medium turnips, peeled and halved (smaller turnips are better than huge ones)

Heat broiler on high.

Trim lamb of excess fat, and if there is a dry, whitish parchment layer, remove that. Be gentle about the fat - don't dig into the meat. You want to leave a thin layer of fat. Season lamb with salt and pepper and place in roasting pan.

Slide the lamb under the broiler until the fat begins to sizzle and the surface of the meat takes on a brown speckled appearance, about 5-10 minutes. Turn the meat by grabbing the bone with a dish towel, and broil the other side for 5-10 minutes. Transfer lamb to a baking sheet.

Turn down oven to 275 F, and place rack in lower third of the oven.

Pour excess fat out of the roasting pan, being careful not to discard the brown bits and juices. Set pan over one or two burners set on high, add the wine, and bring to a boil. Boil until the wine is reduced by about half, about 5 minutes. Add stock, bay leaves, thyme, garlic, and tomatoes with their juice, and bring to a boil.

Return lamb to roasting pan, lower heat to medium high, and bring liquid back up to a simmer. Scatter the onions, carrots, and turnips around the meat. Cover pan with heavy duty foil, and place lamb in oven. Braise for 5 to 7 hours (it will depend on how much meat there is), gently turning every two hours using two large slotted spoons. The meat will be falling off the bone.

If you are worried your oven might run hot, or that the meat might cook too fast, turn the oven temperature down to 265 F the first two hours (this is what I did).

Carefully transfer lamb to a serving dish. Don't worry if everything falls apart at this point! Skim juices of fat (or use a gravy separator), discard it, and bring juices up to a simmer. Taste, and add salt and pepper as needed. Spoon sauce over meat and vegetables. You will not have to carve the meat - it will be that tender. Simply provide a serving spoon!

Thursday, March 15, 2007

Moorish Apricot Delight Biscotti


Another biscotti recipe from the delightful little tome, Biscotti. I really could not taste the saffron (the author advises not to use more than 8 filaments, or the cookies can develop a medicinal taste). The recipe called for a 1/4 teaspoon ground cloves, which I left out, substituting a teaspoon of orange zest. The cookies were still tasty, and absolutely beautiful to look at. They look like they are studded with jewels! What did I like best about them? The apricots - they pack a huge flavor wallop. I enjoyed them so much, I'm probably going to add more to the next batch, as well as additional orange zest!
Moorish Apricot Delight Biscotti
  • 8 saffron filaments
  • 2 Tablespoons orange juice
  • 1/2 cup butter, unsalted
  • 3/4 cup sugar
  • 2 eggs
  • 2 cups plus 2 Tablespoons unbleached all purpose flour
  • 1 1/2 teaspoons baking powder
  • 1 teaspoon orange zest
  • 1/4 teaspoon salt
  • 3/4 cup apricot halves, finely chopped (spray your knife with cooking spray to make this easier)
  • 2/3 cup pistachio nuts
Preheat oven to 325 F and set rack in the middle.
Sprinkle saffron onto orange juice in a small oven proof bowl. Heat in preheated 325 F oven for 5 minutes to infuse flavor.
In a separate mixing bowl, cream butter and sugar until light and fluffy. Beat in eggs, orange juice with saffron, and zest. In another bowl, combine flour, cloves, baking soda, and salt. Gradually add the dry mixture to the wet ingredients until well mixed. Fold in apricots and nuts.
Divide dough in half. On a greased and floured baking sheet (or a Silpat) roll dough into two separate logs about 12 inches long, 1 1/2 - 2 inches wide, and about 1 - 1 1/2 inches tall.

Bake for 20-25 minutes, or until lightly browned (I had to bake them for 35 minutes, but your oven may be different). Remove from oven, transfer logs carefully to cooling rack, and cool for about 5-10 minutes.

Place logs on cutting board and slice cookies about 1/2 inch thick, using a serrated knife positioned at a 45 degree angle. Lay slices flat on baking sheet and return to oven to dry out, about 10-12 minutes total. After about 5 minutes, turn the cookies over. Let cool on rack.

Monday, March 12, 2007

Roasted Chicken with Crispy Potatoes


Mmmm. Those crispy potatoes you see in the picture above never made it to a plate, much less a serving dish. Boy, were they good.

What inspired me to try this was an episode of America's Test Kitchen on public television. I've butterflied and roasted a chicken before, but what intrigued me about this recipe was the placing of potatoes under the chicken while it roasted. The test kitchen crew raved about the results, claiming that the potatoes were so popular that the chicken almost became the side dish.


Well, I had to try this. I had about two-and-a-half pounds of red skinned potatoes that I wanted to use up. And I had just purchased an organic chicken (on sale!) at Whole Foods. Chicken is Master Chow's soul food, so I'm always keeping my eyes peeled for good deals.

So, I brined the chicken (using 1 cup of kosher salt to 8 cups of water) first. This helps retain moisture and adds flavor. Do not brine a chicken for more than two to three hours; if you do so, it can lead to chalky meat. Not always, but better safe than sorry. I butterflied it by removing the backbone, then I pushed down on the chicken until it was flat. I prepared an herb butter to put under the skin, lined the bottom of the grill pan with heavy duty foil, and layered in the potatoes with salt, pepper, and left over herbs. Into a 500 F oven, and an hour later . . . voila!


Those potatoes were good. Egads. They were crispy and golden on the outside, but the insides were moist and creamy. As I said, they never made it off the cutting board. I ate about half the potatoes before I begged Master Chow to get in the kitchen and finish them off. I felt like an anaconda that had just eaten its winter food supply. I had to go lie on the couch, belly distended, to recover. And I kept thinking about those potatoes . . . .

Roasted Chicken with Crispy Potatoes
Adapted from America's Test Kitchen
  • 1 3.5 pound to 4 pound chicken, preferably organic
  • 3 Tablespoons softened butter
  • 1 Tablespoon fresh chopped parsley
  • 1 teaspoon fresh chopped thyme
  • 1 garlic clove, crushed
  • 1 teaspoon Dijon mustard
  • 1-2 teaspoons lemon juice
  • 2 quarts (8 cups) water
  • 1 cup kosher salt
  • salt and pepper to taste
  • 2 - 2 1/2 pounds of potatoes

Line the bottom of a grill pan with heavy duty foil. Place oven rack in the middle of the oven and preheat to 500 F. Please make sure your oven is immaculately clean before you cook at this high a heat, or you will fill your kitchen with smoke!

The Brine

Dissolve 1 cup kosher salt in 2 quarts water. Soak chicken (unless it's a kosher bird, then it already has been brined) for 2-3 hours. Remove chicken, rinse off salt, and thoroughly pat dry. Wet skin will not brown well in the oven. In fact, the Test Kitchen crew advises leaving the bird uncovered in the refrigerator for a few hours after brining to assure that the skin is thoroughly dried out.

Preparing the chicken

In a small bowl, smash together the butter, parsely, thyme, garlic, mustard, and lemon juice. Set aside. Remove the backbone from the chicken. Press down on it to flatten it as much as possible. Salt and pepper the bird. Place the chicken on the top part of the grill pan. Gently work the butter mixture under the breast and leg skin.

Prepping the potatoes

Scrub the potatoes clean and pat dry (I used red skinned and one russet). Using the #1 slicing disk (the thinnest one) on a Cuisinart, slice the potatoes. Spread them out in the lined grill pan, add salt and pepper, and any left over herbs.

Roasting

Place the slotted grill pan with the chicken on top of the potatoes. Place in oven and cook for 45-60 minutes until done (it will depend on your chicken size and your oven). Remove from oven and let chicken rest for about 10 minutes, while you devour the potatoes and burn your fingers. Alternatively, turn the potatoes out onto a plate and peel back the foil to expose the crispy undersides.

Oh, I will have to make these again!

Friday, March 09, 2007

Blogger News

  • Elise has an informative post on gnocchi. She discloses that the secret to a light gnocchi is to use older potatoes (because they are drier), and bake them to keep them as dry as possible. My paternal grandmothers (Italian and Spanish) told my mom the same thing!
  • Food blog discoveries: Rice and Noodles, Jumbo Empanadas.
  • Homesick Texan has posted a recipe on a delicious-looking Czech pastry that I'll have to try, kolaches.
  • Kathy continues to eat at an extraordinary rate. She will soon be winging home to Hawai'i where I'm sure she will regale us with further gastronomic adventures. I can hardly wait!
  • I just received my Cupcake Courier in the mail. Of course, you know what this means . . . I will have to bake some cupcakes. That's just the way it is. Ah, decisions, decisions . . . .

Thursday, March 08, 2007

Pignoli (Pine Nut) Biscotti

**Update** Thanks to Chris for leaving a comment. When I went to visit her blog, I discovered that her biscotti baking pictures were the ones that had inspired me to bake some of my own. I had not remembered whose blog it was until she posted. Thanks, Chris!**
Yesterday, Master Chow went away on a business trip, and it was snowing outside. With a number of food items that need to be used up, what else could I do but bake? That's my story and I'm sticking to it!

I baked four batches of cookies - two biscotti recipes and two drop cookie recipes. Here, I present you with Pignoli Biscotti.

I really like pine nuts. And lemon is one of My Top Five Favorite Flavors. This cookie has both. Oh, you want to know all five flavors? Here they are: passion fruit, lemon (and orange and lime), vanilla, butter, almond. Yes, I love chocolate, but I find that I rarely order a chocolate dessert. If passion fruit is on the menu, that's what I get. No contest.
So I pulled out a little book I've had sitting on the shelf for a few months, Biscotti, and started baking. The cookies are a soft golden color, with a discernible but not overpowering taste of lemon. Surprising, given the amount of lemon zest in them. The pine nuts are a creamy counterpoint to the lemon.
Not willing to let good enough alone, I dipped some of them in semi-sweet chocolate. I've paraphrased the recipe for brevity.

Pignoli Biscotti

2/3 cup pine nuts
1/2 cup butter, softened
3/4 cup sugar
2 eggs
2 Tablespoons lemon juice
2 Tablespoons lemon zest
2 cups plus 2 Tablespoons unbleached all purpose flour
1 1/2 teaspoons baking powder
1/4 teaspoon salt
Preheat oven to 325 F and set rack in the middle. Place nuts in shallow pan and toast until light brown. Let cool.
Combine butter and sugar until light and fluffy. Beat in eggs, lemon juice, and zest. In another bowl, combine flour, baking soda, and salt. Gradually add the dry mixture to the wet ingredients until well mixed. Stir in nuts.
Divide dough in half. On a greased and floured baking sheet (or a Silpat) roll dough into two separate logs about 12 inches long, 1 1/2 - 2 inches wide, and about 1 - 1 1/2 inches tall.
Bake for 20-25 minutes, or until lightly browned (I had to bake them for 35 minutes, but your oven may be different). Remove from oven, transfer logs carefully to cooling rack, and cool for about 5-10 minutes.
Place logs on cutting board and slice cookies about 1/2 inch thick, using a serrated knife positioned at a 45 degree angle. Lay slices flat on baking sheet and return to oven to dry out, about 10-12 minutes total. After about 5 minutes, turn the cookies over. Let cool on rack.

Wednesday, March 07, 2007

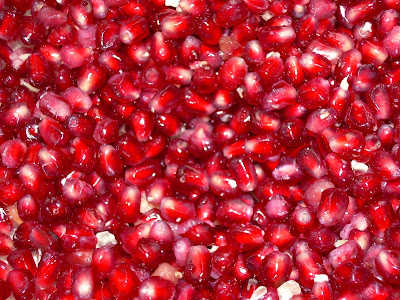
Pomegranates Are Good for You

Edible rubies!

Lately, I've been buying pomegranates, cleaning them, and keeping them in a container in the fridge. I throw them in salads, and Master Chow puts them in his granola or his oatmeal in the mornings. Not only are they high in anti-oxidants, new research indicates that they may reverse atherosclerosis, lower high blood pressure, slow down several types of cancer, and help maintain skin health:

These studies indicate that pomegranate confers unprecedented cardiovascular protection by restoring endothelial health, lowering blood pressure, and protecting low-density lipoprotein (LDL) from damaging oxidation. Pomegranate also appears to fight several of the most common forms of cancer, slowing the progression of prostate cancer and suppressing the growth of colon, breast, and lung cancer cells. Pomegranate even appears to shield against unsightly signs of aging by supporting the health of the skin’s underlying matrix.

Tuesday, March 06, 2007

"World's Best Braised Green Cabbage"


I've been happily cooking from one of my favorite new cookbooks, Molly Stevens All About Braising: The Art of Uncomplicated Cooking.
Master and Madam Chow have not been disappointed.
This is a true teaching cookbook, and one that is easily accessible to novices in the kitchen. Stevens provides a detailed description of the finished dish, then step-by-step instructions on how to prepare it. I should clarify: instructions that actually make sense. These recipes clearly have been tested again and again. They work, and they taste wonderful. Stevens also provides wine pairings, and often gives practice pointers, such as how to select parsnips, or spare ribs.
I had a head of green cabbage in the refrigerator that I wanted to use up. Again, part of my effort to include a greater variety of veggies in our diet. But I had been waiting to use it because I wanted to try something different. Something exciting (well, as exciting as cabbage can be). And I found it in Molly Steven's book.
The expansive title is hers, not mine. This cabbage dish is wonderful - it mellows and becomes sweet, especially with the optional addition of balsamic vinegar. Next time, I will quadruple the amount of carrots called for in the recipe. The cabbage was great, but the carrots were incredible. Master Chow loves his vegetables, but even I was impressed as he kept saying "this is delicious" with his mouth full of cabbage. Yes, folks, cabbage.
Now, go eat your veggies!
"World's Best Braised Green Cabbage"
from All About Braising, by Molly Stevens
(Instructions paraphrased for brevity)
  • 1 medium head green cabbage, about two pounds
  • 1 large yellow onion, thickly sliced, about 8 oz.
  • 1 large carrot, sliced in quarter-inch rounds
  • 1/4 cup chicken stock or water (I used vegetable stock)
  • 1/4 cup extra virgin olive oil
  • coarse salt and freshly ground black pepper
  • 1/8 teaspoon crushed red pepper flakes, or to taste
  • fleur de sel or coarse sea salt
  • 1 1/2 Tablespoons balsamic vinegar

Heat oven to 325 degrees F. Lightly oil a large baking dish or gratin dish (9 by 13 inch works).

The cabbage should weigh close to two pounds - if it's much bigger than this, set some of it aside for another use, or the dish will not braise properly. Trim off damaged outer leaves, core, and slice cabbage into 8 wedges. Arrange the wedges in a single layer, although a small bit of overlap is fine.

Scatter in the onions and the carrot. Drizzle over the oil, and the stock (or water). Season with salt, pepper, and red pepper flakes. Cover tightly with foil and slide into the middle of the oven until the vegetables are very tender, about two hours. After an hour, gently turn the cabbage wedges using tongs. Try to keep the wedges together, but don't worry if they start to come apart. If the braise looks like it is drying out, add a few tablespoons of water.

Once the cabbage is completely tender, remove from the oven and then remove the foil (carefully, a lot of steam will escape). Increase the oven temperature to 400 F. Sprinkle on the balsamic vinegar, and turn the cabbage with tongs to distribute the vinegar. Return to the oven and roast for another 15 minutes until the vegetables begin to brown. Serve sprinkled with coarse salt or fleur de sel.

Sunday, March 04, 2007

Cream Scones


I am a big fan of Dorie Greenspan's book, Baking: From My Home to Yours. Her descriptions of each tasty treat, along with wonderful pictures, are enough for me to put on five pounds, just by reading. Alas, I do not have Kathy's (of A Passion for Food) metabolism. That girl can eat!

So, I decided to try her Cream Scone recipe. Delicious. These are flaky with a rich, buttery taste. Ah, butter. Further proof that God loves us! Of course, I snatched one up right out of the oven - I should have listened to Dorie and let them sit for about 10 minutes. The flavor will really develop during that time, and the scones will pull together and not be quite as crumbly to eat.

There was a small mistake in the recipe (it called for currants but did not include an instruction for adding them into the dough). I tweaked it a bit to suit my tastes: I eliminated the currants and added chocolate chips, plus some vanilla bean paste. If you don't have the paste, substitute two teaspoons of vanilla extract. Dorie gives great instructions on how to make the scones by hand, but they are a snap to put together if you mix the whole batch in a food processor so that you don't over mix the butter or the dough.

Cream Scones
Adapted from Dorie Greenspan's "Baking from My Home to Yours"


1 large egg
2/3 cup cold heavy cream
2 teaspoons vanilla bean paste
2 cups all-purpose flour
2 Tablespoons sugar
1 Tablespoon baking powder
1/4 teaspoon salt
5 Tablespoons butter, cut in small pieces and chilled
3/4 cup chocolate chips
cream or milk, and sugar for glazing

Center a rack in the oven and preheat it to 425 degree F. Line a baking sheet with parchment or a Silpat.

Stir together the egg, cream, and vanilla bean paste.

In a food processor, pulse together the flour, sugar, baking powder, and salt. Add the butter and pulse about 5 or 6 times, until you have a mixture that includes both pea-sized and smaller pieces of butter. Add the cream mixture and pulse two or three times. Do not over mix! You will finish pulling the dough together in a moment. It should still appear rather crumbly.

Lightly dust a work surface with flour and turn out the dough. Gently work in the chocolate chips. Knead only about 8 to 10 times as you pat the dough into a circle, about 3/4 of an inch thick. With a sharp knife, cut the circle into six wedges and place on prepared baking sheet.

Brush tops of scones lightly with cream or milk, then sprinkle with sugar. Bake 20-22 minutes until tops are golden and firm.

After removing from oven, let scones rest for about 10 minutes before eating them. If you have the willpower to do so, that is.

Nap Time

How's a guy supposed to get a nap with all the paparazzi?